


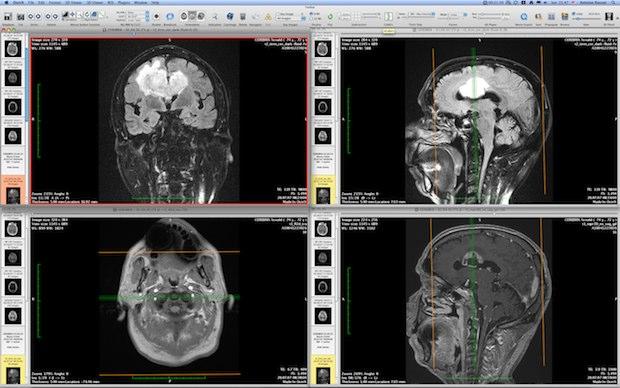
Getting the right contrast in medical images can make or break your diagnostic accuracy.
When you’re working with a DICOM medical image viewer, knowing how to adjust window and level settings becomes your most valuable skill.
These controls determine what you see and how clearly you can spot critical details that matter for patient care.
What Does Window and Level Really Mean?
Think of window and level like the brightness and contrast controls on your TV, but much more precise. The window controls how much contrast you see between different tissues.
A wider window shows more gray levels but with less contrast. A narrow window gives you high contrast but shows fewer details.
The level setting determines which part of the image data you’re looking at. It’s like choosing which “slice” of brightness values gets displayed. Set it too high or too low, and important structures disappear into black or white.
Here’s how these settings work together:
| Setting | Wide Window | Narrow Window |
| Contrast | Low contrast, more details visible | High contrast, fewer gray levels |
| Best for | General overview, soft tissue | Bone imaging, lung examination |
Getting Your Settings Right for Different Body Parts
Different tissues need different approaches. You wouldn’t use the same settings for looking at bones as you would for examining soft tissue.
Each anatomy type has optimal ranges that radiologists have refined over decades.
Bone imaging works best with wide windows (around 2000-4000 HU) and high levels (300-500 HU). This combination lets you see both cortical bone and surrounding soft tissue clearly.
Lung tissue requires even more expansive windows (1000-2000 HU) with lower levels (-400 to -600 HU). The air-filled lungs create an extreme contrast that needs careful handling.
Soft tissue examination uses narrow windows (300-500 HU) with levels close to water density (0-50 HU). This setup maximizes contrast between different organ types.
The Science Behind Optimal Contrast
Medical imaging relies on Hounsfield Units (HU), which measure the amount of X-ray absorption by different tissues. Water sits at 0 HU, air at -1000 HU, and dense bone can reach +3000 HU or higher.
Your window width determines how many of these HU values get spread across the available gray levels on your monitor.
Most monitors display about 256 different gray shades. If you set a window width of 256 HU, each gray level represents 1 HU of difference. Make it 512 HU wide, and each gray level now represents 2 HU.
Research shows that human eyes can distinguish about 60-100 different gray levels simultaneously. This limitation explains why proper windowing matters so much. You need to map the tissue differences you care about into the range your eyes can perceive.
Practical Steps for Better Image Quality
Start with preset values for your specific exam type, but don’t stop there. These presets give you a baseline, but every patient and every scan has unique characteristics.
Watch the histogram while you adjust settings. The histogram shows the distribution of pixel values in your image. If you see essential peaks being truncated at the edges, you’re probably missing crucial information.
Adjust gradually rather than making big jumps. Small changes often reveal details that dramatic shifts hide. Move the level first to center on the anatomy you’re examining, then fine-tune the window width.
Use multiple window settings for the same image when needed. Don’t feel locked into one setting for the entire examination. Switch between bone and soft tissue windows as you evaluate different structures.
Common Mistakes That Hurt Image Quality
Many people set their windows too narrow, thinking high contrast always helps. But excessive contrast can hide subtle pathology that appears as intermediate gray values. You might miss early-stage lesions or minor fractures.
Setting levels incorrectly causes even more problems. Put the level too high, and darker structures disappear. Set it too low, and bright areas become meaningless white blobs.
Monitor calibration affects everything, too. An uncalibrated display can make perfectly adjusted images look wrong.
Regular calibration ensures your window and level adjustments produce the results you expect.
The key to mastering these controls lies in understanding what you’re trying to see and matching your settings to that goal. Every adjustment should have a purpose – better visualization of specific anatomy or pathology.
When you combine proper technique with quality medical imaging software, you’ll notice immediate improvements in diagnostic confidence.
The right window and level settings turn unclear images into clear clinical information that helps your patients get better care.